Monday 30 April 2012

My Trademark Cake


Well, it turns out not just my trademark, but also the only cake I can make.

As in, I was supposed to take in cake to Izzy's school for her birthday, tried to make a pink sponge cake and burned the outside. Plus it ended up orange. And uncooked on the inside.

Had to run out to Aldi the night before for cupcakes.

But this one I can do every time!

The recipe is here.


For this version (as a birthday present for my sister) I did two cakes and layered them on top of each other. The topping is 150ml double cream melted with about 300g of dark chocolate. Then I stuck some Malteasers in there! 


I also did a version for Izzy's birthday.


I did two different sizes, the bottom one is covered in pink butter cream and surrounded with buttons. The top has chocolate topping with raspberries. Though if you do use fresh fruit try to do it as last minute as possible...


I did mine the night before and you can see that the moisture leaked out a little into the sauce. Ignore the crack, that's just me being clumsy! 

The chocolate shapes and letters are SO easy. Just fill an icing tube with melted chocolate and pipe your shapes onto grease proof paper. Izzy did a sheet of her own too! Then used them to decorate the Rapunzel biscuits that were an actitvity for her party with her friends.

Phew, it's been a busy few weeks! 


Nuff said.

Thursday 26 April 2012

Easy, Stress Free Party

Okay, maybe not stress free, but a LOT less stressful than my four year old's party that was just two weeks after this one!

When Ethan turned two just a few weeks ago. I knew I wanted to keep it low key. He's only little after all, and isn't keen on lots of people or a lot of structure. Plus he also had another family party the same evening. 

Here's how we did his friends' "party".


These were the invites we sent out to Ethan's three best friends. Just a quick mess about in Picnik (or you could just as easily do it in PicMonkey now) to make them. 

Some key points that worked for us/Ethan:

  • Bear in mind time, I picked a time when all the kids would have been fed, so I didn't have to worry about providing a lot of food. Plus I knew Ethan would have had his nap.
  • Pick a few activities, but don't worry if you don't get them all done. We went with the flow. I had some activities ready to go (more on that in a bit) and some ideas that didn't happen because of the weather. Plus we let the boys and Izzy do what they wanted; play upstairs, read, etc.
  • Pick one snack and just worry about that. I decided cupcakes would be a nice one, plus we also turned it into an activity.
So here's how we did it. 

When the boys arrived there were all Ethan's dinosaurs in the living room with blocks to add scenery. When the boys arrived we opened presents from them and played, just letting them settle in with their parents and get used to our house.


Then we decorated dinosaur cupcakes! I made some banana and chocolate cupcakes and had sweets, icing and sprinkles out so the kids could decorate as they wanted. (then eat them!)


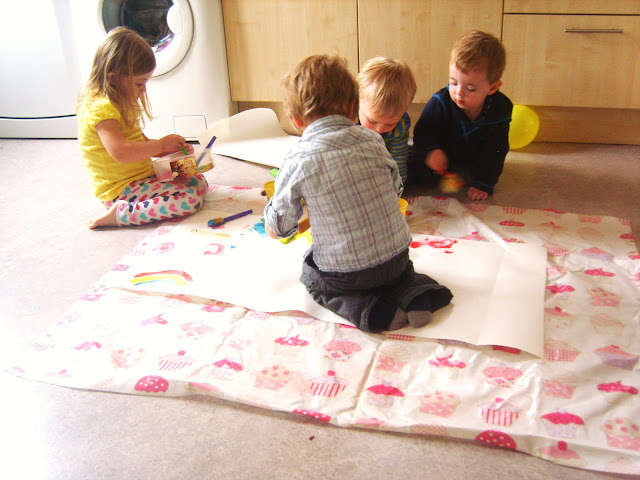
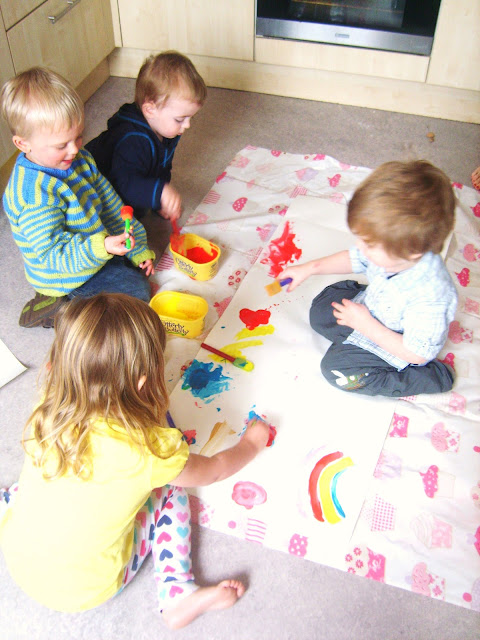
Then the boys played upstairs (Ethan persuaded them!) while I got the painting activity ready.


All the kids were informed it was messy play, but I did offer painting aprons. No takers though! 


It got pretty messy, pretty quickly...


Why's she crying?


She wanted to walk over the painting...of course. :)

Then the boys and mums got cleaned up and played with the dinosaurs in the living room. 

And I got out the Dino tail party favours!


Here's a couple of better pictures taken after the party...


The boys and mums went home happy, and I had very little clean up to do! Sweet! 

So what about you? Any tips on how to have a stress free kids party (if that's possible!).

Tuesday 24 April 2012

Bow Tie - Fail?

I saw this super cute idea from Kelly at Sewing in no man's land.

A felt clip on bow tie for a little boy (click across and check them out, her models are adorable too! Plus she's a pro photographer, such cute pictures!)

And thought, I can totally make them! I did mine a little different (read "easier" ;) ). Sunday morning I tried in on Ethan for church...

Lets just say Ethan is not going to be the next Dr. Who.

Apparently ties are a big yes. Bow ties? No.

Fortunately Izzy already thought the "clips" were for her.


"Smile!"


Plus I actually think they look pretty cute as over-sized bows!


I wish I had better photos, but in all honesty it was wet outside and I couldn't find my shoes...

So I'm thinking not a fail? At least one of my kids will get use out of them. And they were so easy too! Literally took as long to heat up my glue gun as to make them!

Sunday 22 April 2012

Make Your Own Flynn Rider Bag!


For those not in the know/not in possession of a little girl. Here's Flynn Rider (from "Tangled", Disney's Rapunzel):


This is also the sign that went near the bags at Izzy's party. They had sweets inside and were the party favour for the boys.

So here's how I made them....


Sorry for the rubbish pics, I had to use my phone!

I made four of the bags, not sure why only three are pictures here...make the piece double the length you want and the width you want plus an inch or so. 

Luckily my MIL gave me an old leather skirt she thought I might like to upcycle (she knows me so well!), I still have enough for making some baby booties in the future too!


Fold it in half, right sides together, and sew up the sides leaving the top open.


Back stitch in the open ends (at the top) to make sure it wont come undone later.


Open up the bag, fold the side down onto the bottom of the bag to form a triangle bottom and sew across an inch up. Repeat on the other side.


Cut the corners off. You now have a bottom to your bag!


(Turned inside-out.)

Then cut a length of your fabric for the strap. I used my tape measure as a pretend strap on Izzy to see how long it needed to be, and made it about 2 inches wide. 


Sew it into the sides of the bag.


Measure the width and depth of your bag and cut out a piece of fabric.


Sew it onto the back of your bag and let it flap over the other side...


It should look something like this.

I then just finished mine off by rounding the edges and hot gluing on a button.


And of course filled them with sweets, okay three chews. I may be a little stingy. 

Luckily two of the boys couldn't make it to the party, so Ethan and Izzy were able to get one each too!


Andy calls it his messenger bag.


And Ethan loves it! 

It may seem like a lot of steps, but I was just thorough! I made four of these in under an hour and a half. 

Let me know if you give it a go! 

The girls' headband party favours are here.


Thursday 19 April 2012

Flower Headband Party Favours

There will be many more pictures to come of Tangled party related things. But right now I'm in the middle of finishing favours, cakes, muffins, toppers and attempting to clean my house while looking after my kids! 

But I'm kinda enjoying it! I like being busy :)

Here's what I settled on for Izzy's Tangled theme party favours:


As you can tell by her less-than-pristine face, she's helping out with the baking today!  

I've made eight of these, (they'll be given out along with a bracelet) but for some reason every photo by themselves sucks!


And actually this was the best one! 

I've done a few different colour combos, but I like this one best...


It's the left over scraps from lining the yellow clutch and the date night clutch, and all I bought was a fat quarter! 

Will have plenty of photos soon, including Flynn rider bags with a tutorial, a stripy, pink floor cushion and (hopefully) a little striped and laced dress tutorial!

Can't believe my little girl is four tomorrow. 


Two Yellow Birds Decor

Saturday 14 April 2012

Dinosaur Tails


Sorry for the silence around here this last week. Ethan's birthday and two parties were last Friday...


and my husband has had the week off. Needless to say, we have just been enjoying his company! (and resting after the parties!)

I have a LOT to share with you, I always go a little crazy with the crafting right before my kids' birthdays! 

For now I want to show you these dino tails I made for party favours.


We didn't have a party as such for Ethan, he's only two after all, but we did have two of his friends over for "messy play".


I'll share more about that on another post!


For the party "favours" I used this great tutorial from Jessica at Running with Scissors.


There's something really satisfying about having sets of pattern pieces all cut up and ready to sew!


The boys, and Izzy loved them! 


They are seriously easy to whip up with the tutorial. Especially if you use fleece or felt for the spikes (I just used some left over scraps!).


I don't know if you can tell, but they're shaking their tails from side to side here! They spent about an hour running round the yard playing with these on. 


Anybody else ever made their party favours? I have Izzy's tangled party on Saturday! I'm stumped as to what to make the girls...a headband?

Monday 9 April 2012

One Day Monday - Kids Activities

We're currently half way through our two week Easter holidays here. And I'm realising that now Izzy goes to school, there's a whole lot more entertaining that needs to go on in the holidays.

This was especially obvious last Monday, the first day of our holidays, when I took the kids clothes shopping with me and my sisters. And ended up in A and E with Ethan. 

He got his hand caught in the bottom of the escalator.

Yes. The grindy, stairs disappearing bit.

I was at the top with Izzy, and Ethan was waiting at the bottom with my sister. He somehow managed to get out of her grip and tried to run up the escalator moving downwards.

He fell over and put his hands down. That's when he got his hands caught. My sister grabbed him, but not before his hand started bleeding.

Not a good moment for me. But by some miracle he was only had a minor injury on one finger. In fact, it's healed so well that he's had the bandage off a couple of days already.

On a more funny note. I've now told my sister that her nephew can now legitimately give her the finger...just to show her his scar of course!

So that's why the theme of today is kid-friendly activities!

Bird's Eye View Birdhouse.  Science up close!

I think this bird house is such an awesome idea. It's from Gardeners.com, but is no longer available. I'm sure you could make and decorate your own with the kids. How great would it be to watch the bird's eggs and the adults coming in?

I'd have to make sure ours was on a downstairs window or our kids would never fall asleep!

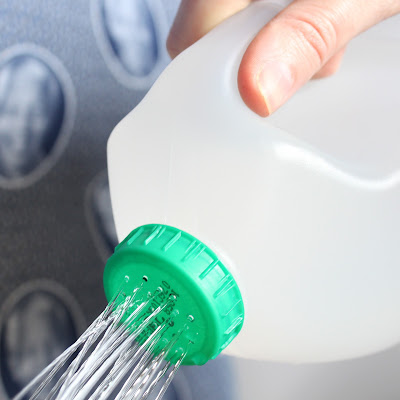
DIY for up-cycled watering can from 'a journey to a dream'

This one is more "I'm cheap" than anything! But last year our watering can got broken, so this is the perfect alternative for our kids. Plus they can each get their own! The tutorial is over at a journey to a dream.


What an awesome, idea! I've got a couple of rolls saved up already, this one may be on our list for today! And I'm sure I could add some pom poms or cotton wool to the mix to make it appeal even more to my craft loving daughter! See the how to at Toys in the Dryer.


This post has loads of different activities in a bottle ideas. This is my favourite! Making them with your kids would be as much fun as playing with them too! The full post is over at Pre-school Play.

What have you got planned this holiday? Any other ideas that don't involve places with escalators?